Tips
Reading this page without going through the tutorial is meaningless. Please read the tutorial first!!!!
SteamVR Integration Steps
- For first-time use, please be sure to restart SteamVR after opening the software. A green indicator light in the upper left corner of the VR panel indicates successful VR integration. If you cannot connect, please see here
- Wear at least 8 tracking points, then click on action calibration. During the calibration of Apose, the headset must be worn correctly [especially when the quick beeping sound occurs]. For specific calibration procedures, please refer here
The thigh, calf, waist, and chest must be worn. If the soles of the feet are not worn, only follow mode can be used!
After normal calibration, please check the tracker on the default SteamVR interface. Be sure to turn off SteamVR Home; otherwise, you will not be able to view the tracker!
Here it is recommended that if any issues arise, first switch to the default SteamVR interface to check if the tracker position meets expectations. In other software, such as VRC, due to IK intervention and many configurations, it does not represent the original tracker position.
- For how to turn off SteamVR Home and change to a white background, please see here
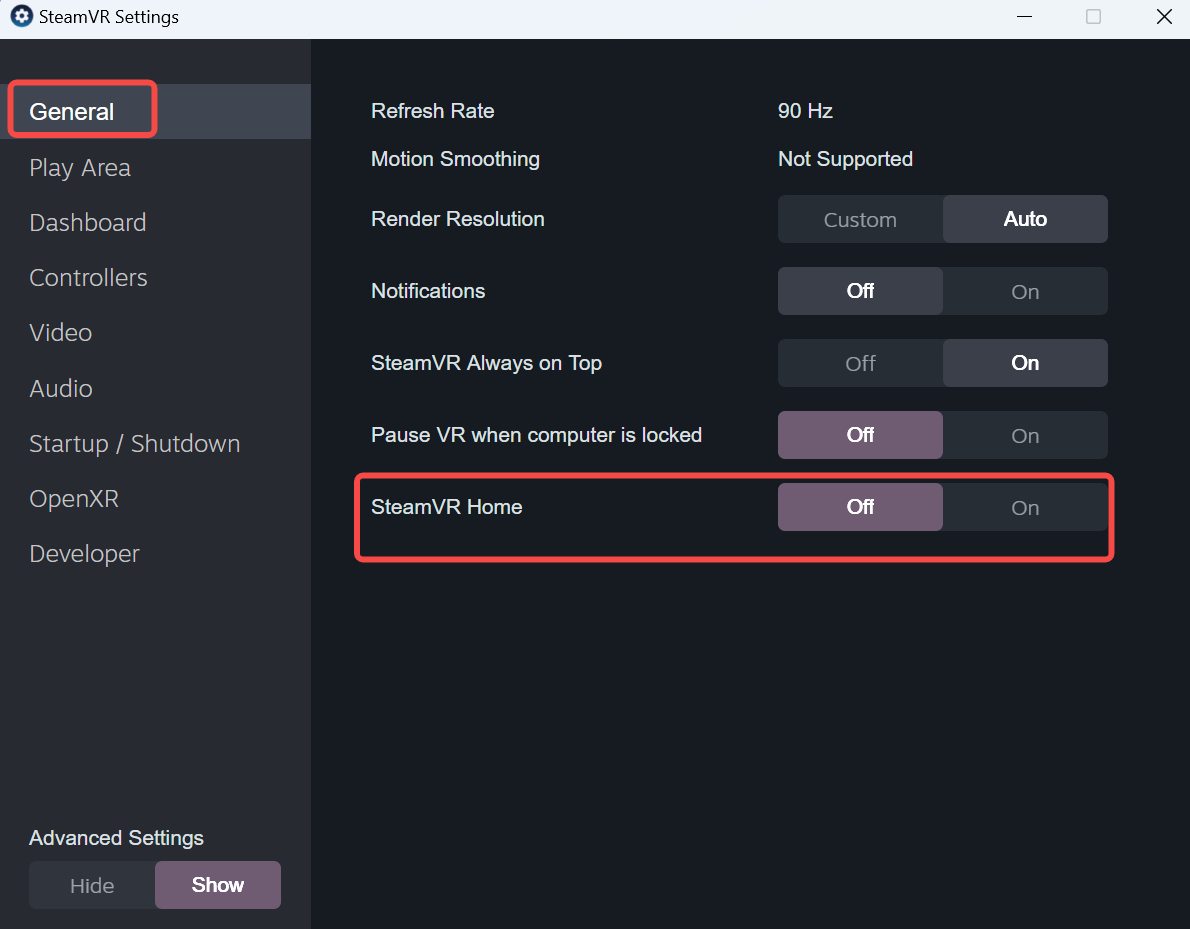
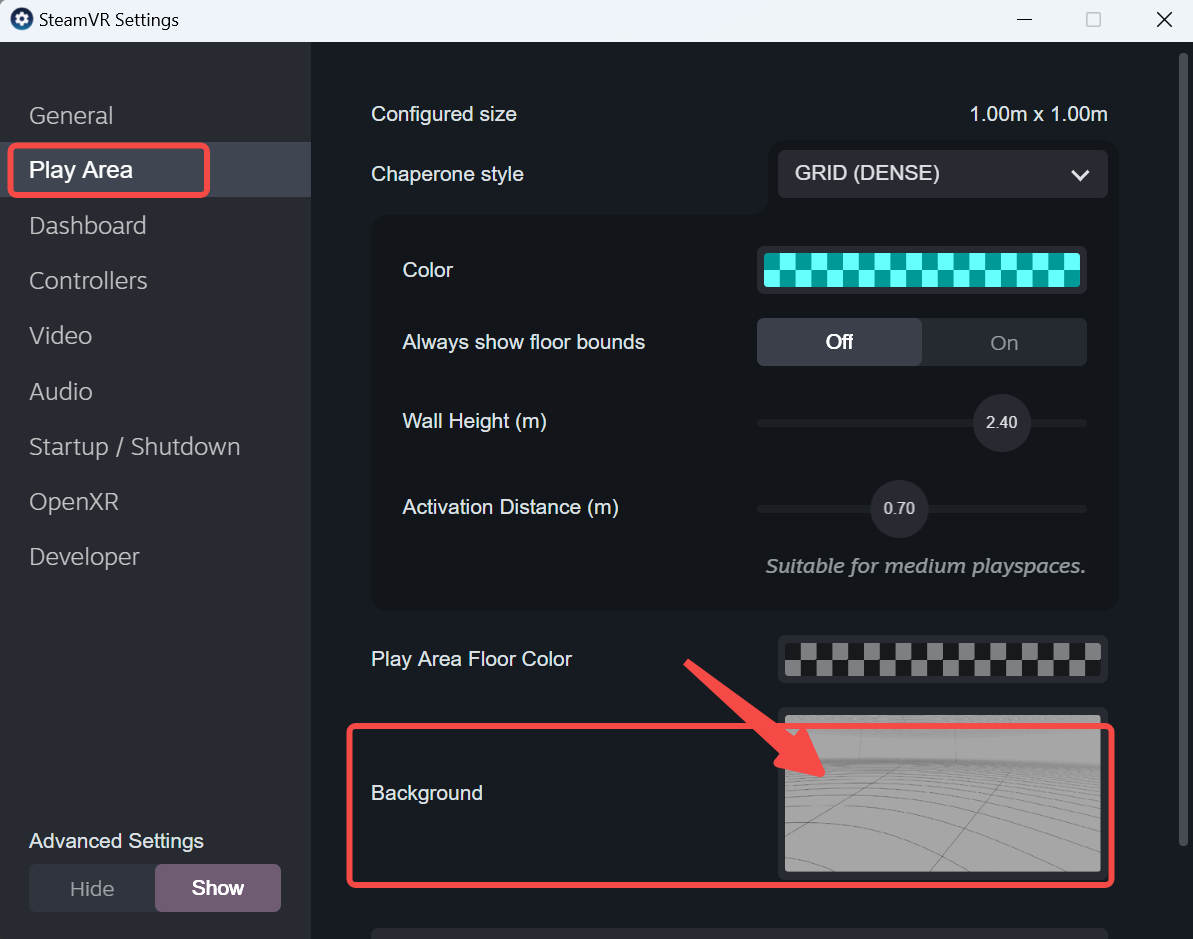
- For how to turn off SteamVR Home and change to a white background, please see here
After wearing the headset, check if the tracker position meets expectations
Here you can open the diagnostic function to copy a set of trackers for easier viewing.
If you encounter errors or issues such as the tracker disappearing, you can restart. It is recommended to restart the rebocap client and SteamVR.
It is also highly recommended to provide feedback in the forum! It may be a SteamVR issue or a rebocap issue. If it is a rebocap issue, we will try to find the problem and update!
If the height difference indicated by the VR calibration is too large, please see here
Below is an integration example in SteamVR. The severe vibration of the head node is caused by jitter in the headset positioning output data!
What to do if the tracker is slanted
If the character appears normal in the 3D preview, but the tracker is slanted relative to itself, there are likely three reasons:
- The all-in-one machine's safety area is not turned off, and the user is near or outside the safety boundary.
Over 90% of users' troubles come from this point.
- Excessive movement causes displacement. In principle, it will automatically correct itself; remaining still for 1-2 seconds is sufficient.
[danger] Foot strap
If using a strap on the soles of the feet, displacement is very likely to occur. For specifics, please see here
- The
ovr advanced settinghas modified the heading angle; it is recommended to reset it to 0. - The spatial coordinate transformation cannot be read. Please see here
If the 3D preview is already slanted, please follow the diagnostics below:
- It is likely that magnetic deviation has occurred, or the magnetic field environment is poor. If this is the first use or an occasional issue in subsequent uses, it is recommended to perform magnetic field calibration first. For specific calibration methods, see here
- Exclude the possibility of the strap being slanted and check if any individual trackers are out of battery or have shut down unexpectedly.
- If there are issues such as crossed legs or other leg problems, please carefully read the strap section and the action calibration section in the tutorial.
- If the issue still cannot be resolved, please rule out magnetic field interference and strongly recommend reading this article thoroughly.
VR Cannot Connect
The VR driver will be automatically and silently installed in the steamvr directory. If you notice that the icon in the upper left corner of the VR panel does not turn green, you can follow these steps to troubleshoot.
- Check if
steamvris running. - Check if the
rebocapreceiver is plugged in and in a connected state. Check if the
rebocapplugin insteamvris blocked. At the same time, you can check if therebocapplugin is installed.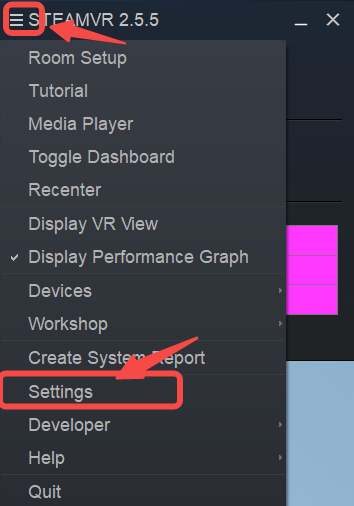
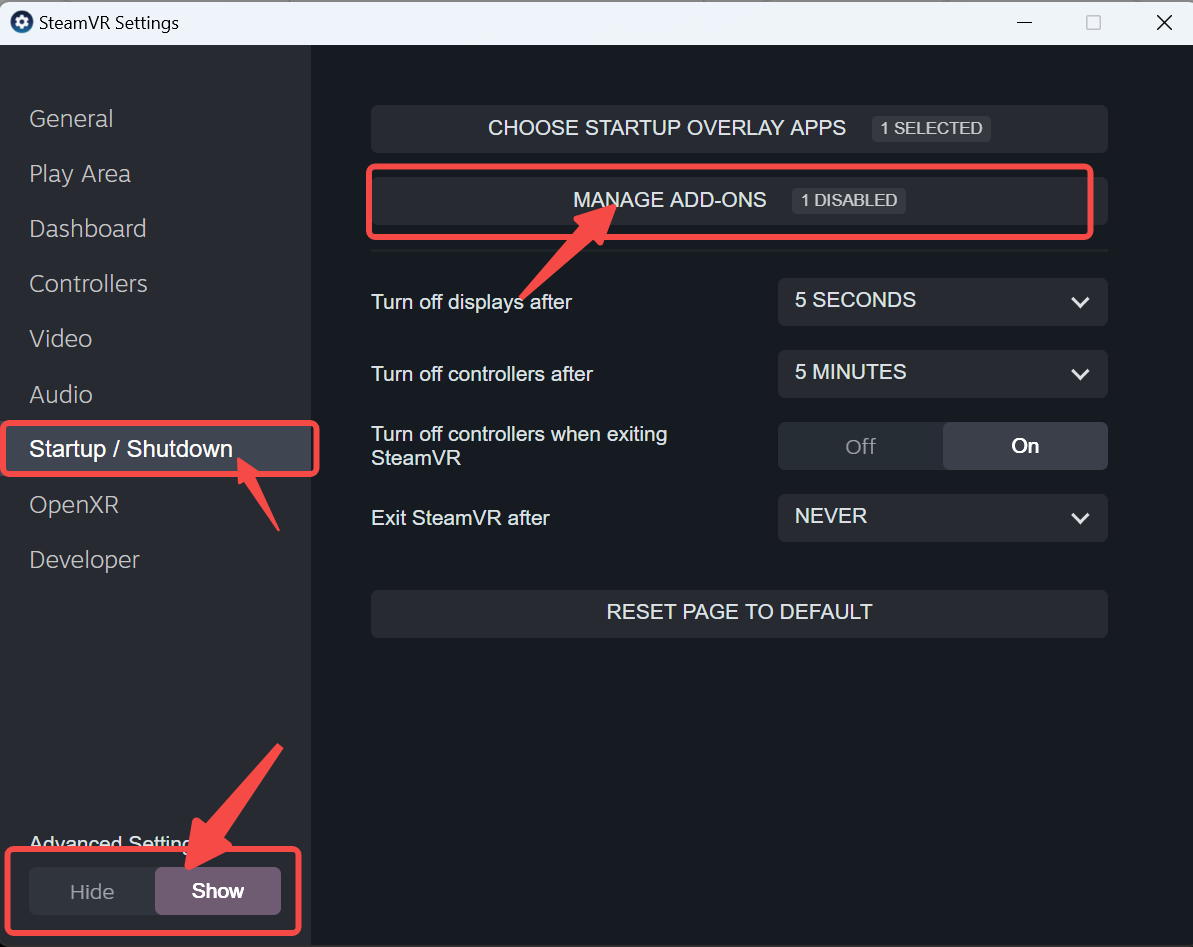
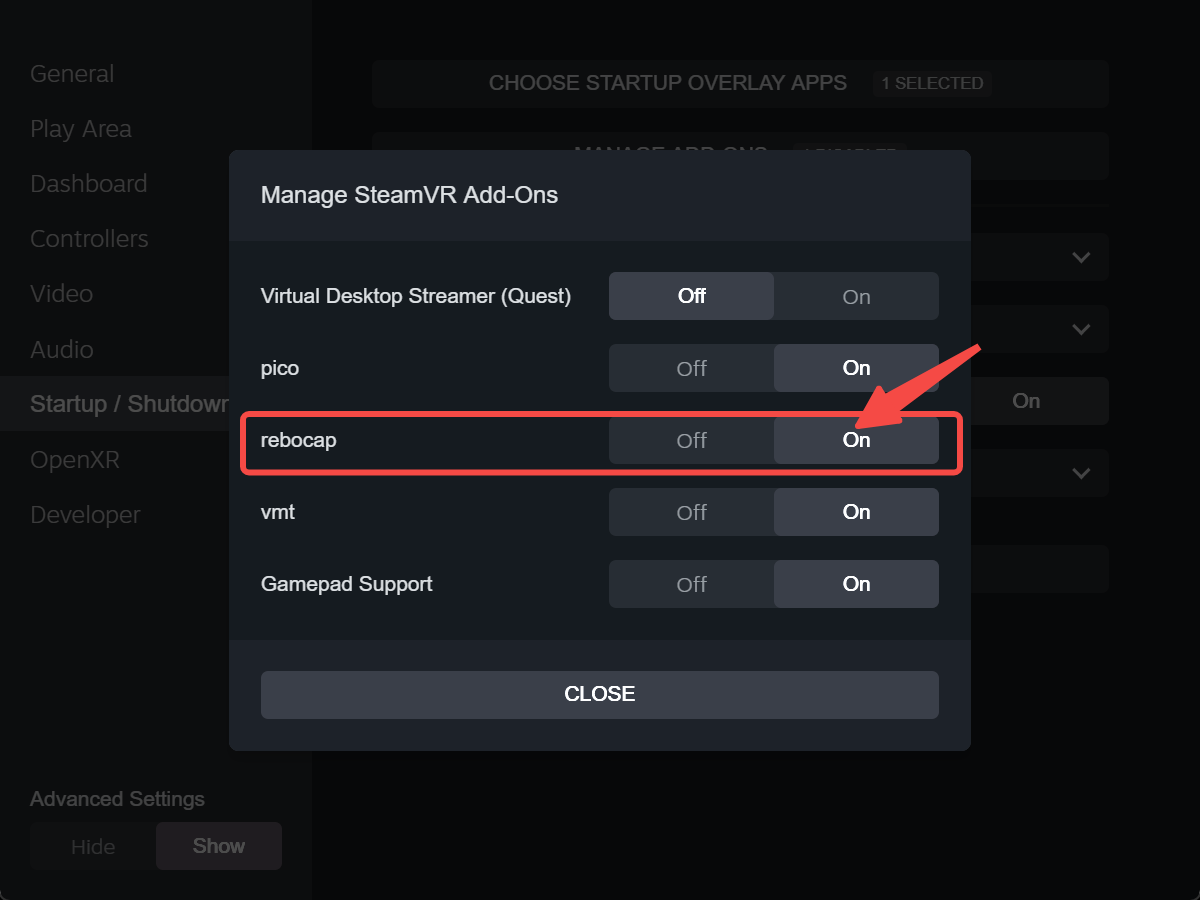
If the
steamvrplugin is not installed in the third step, please manually copy and install it as follows:- Locate the
steamvrinstallation directory, the default installation location isC:\Program Files (x86)\Steam\steamapps\common\SteamVR, and the plugin location is in thedriverdirectory under thesteamvrdirectory.If you have changed the
SteamVRinstallation location, please find it yourself. - Copy
rebocap_driverto thesteamvrplugin directory. Therebocap_driverdirectory is in thedatadirectory of therebocapinstallation directory, as shown in the left image. The final extracted path is shown in the right image.

Other Notes
[info] Attention for Users with Non-English System Names!!!
If your system uses a non-English name, it may cause the coordinate transformation in
steamvrto be inaccessible, resulting in incorrect final positions, with the character floating or falling into the floor in steamvr. At this time, the system often prompts the following at startup: rebocap steamvr plugin exception, unable to find spatial coordinate system. In this case, steamvr can only be recognized if installed in one of the following two directories:
C:\Program Files (x86)\Steam\steamapps\common\SteamVR
D:\Steam\steamapps\common\SteamVR