Blender Plugin Download
Click the link below to download directly:
- Blender Plugin Beta 9
blender with python 3.6~3.12
Update Notes:
- Compatible with Blender 4.4 and above
- Fix process residue bug in rebocap plugin
- Fix the skeleton export bug to stabilize the feet in real-time driver scenarios.
- Support all versions of Python 3, for example, it can support Blender 4.1
- Support direct Mixamo skeleton binding
- Fixed bug with fbx model drivers
- Fixed bug with animation recording axis
- Add bone adsorption selection feature
Blender Tutorial Video
Note: There is no sound here.
Blender Plugin Installation
Installation steps:
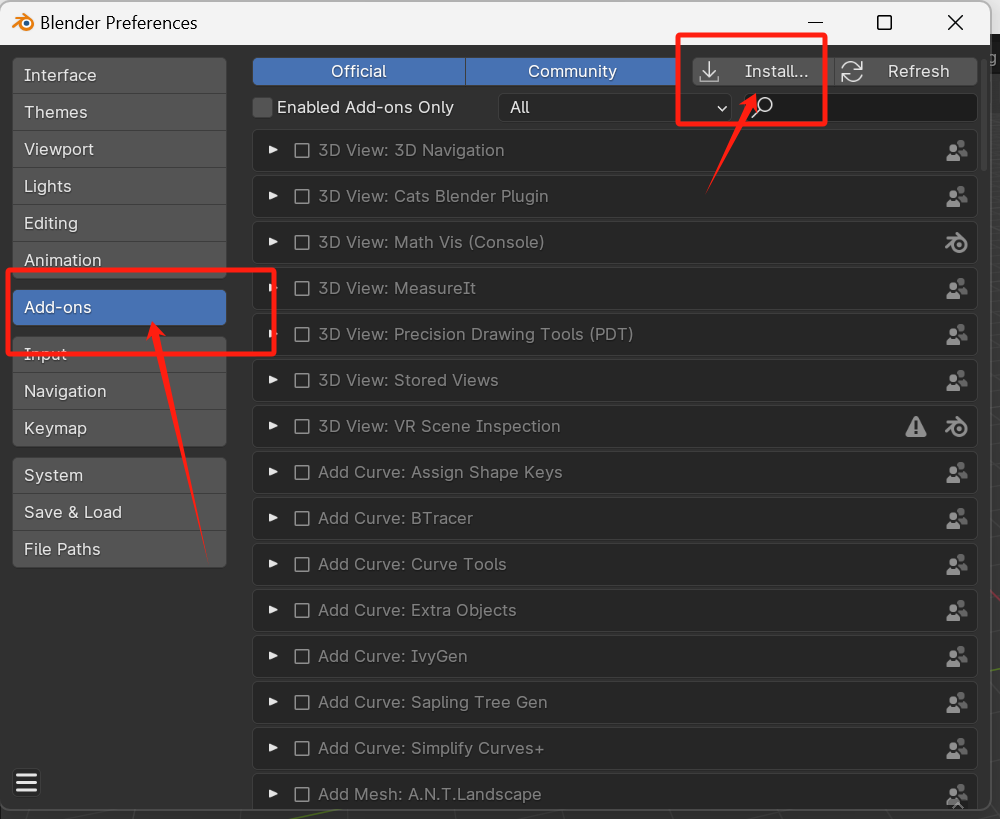
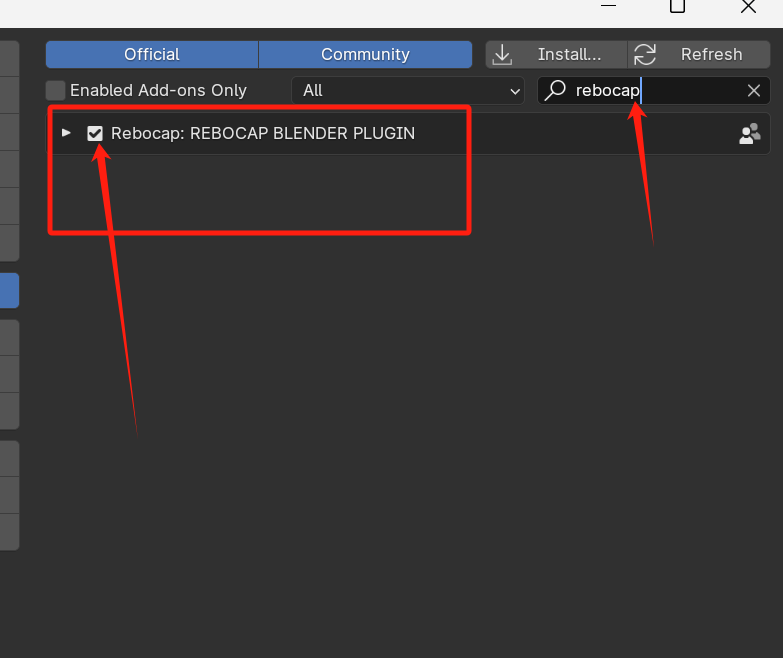
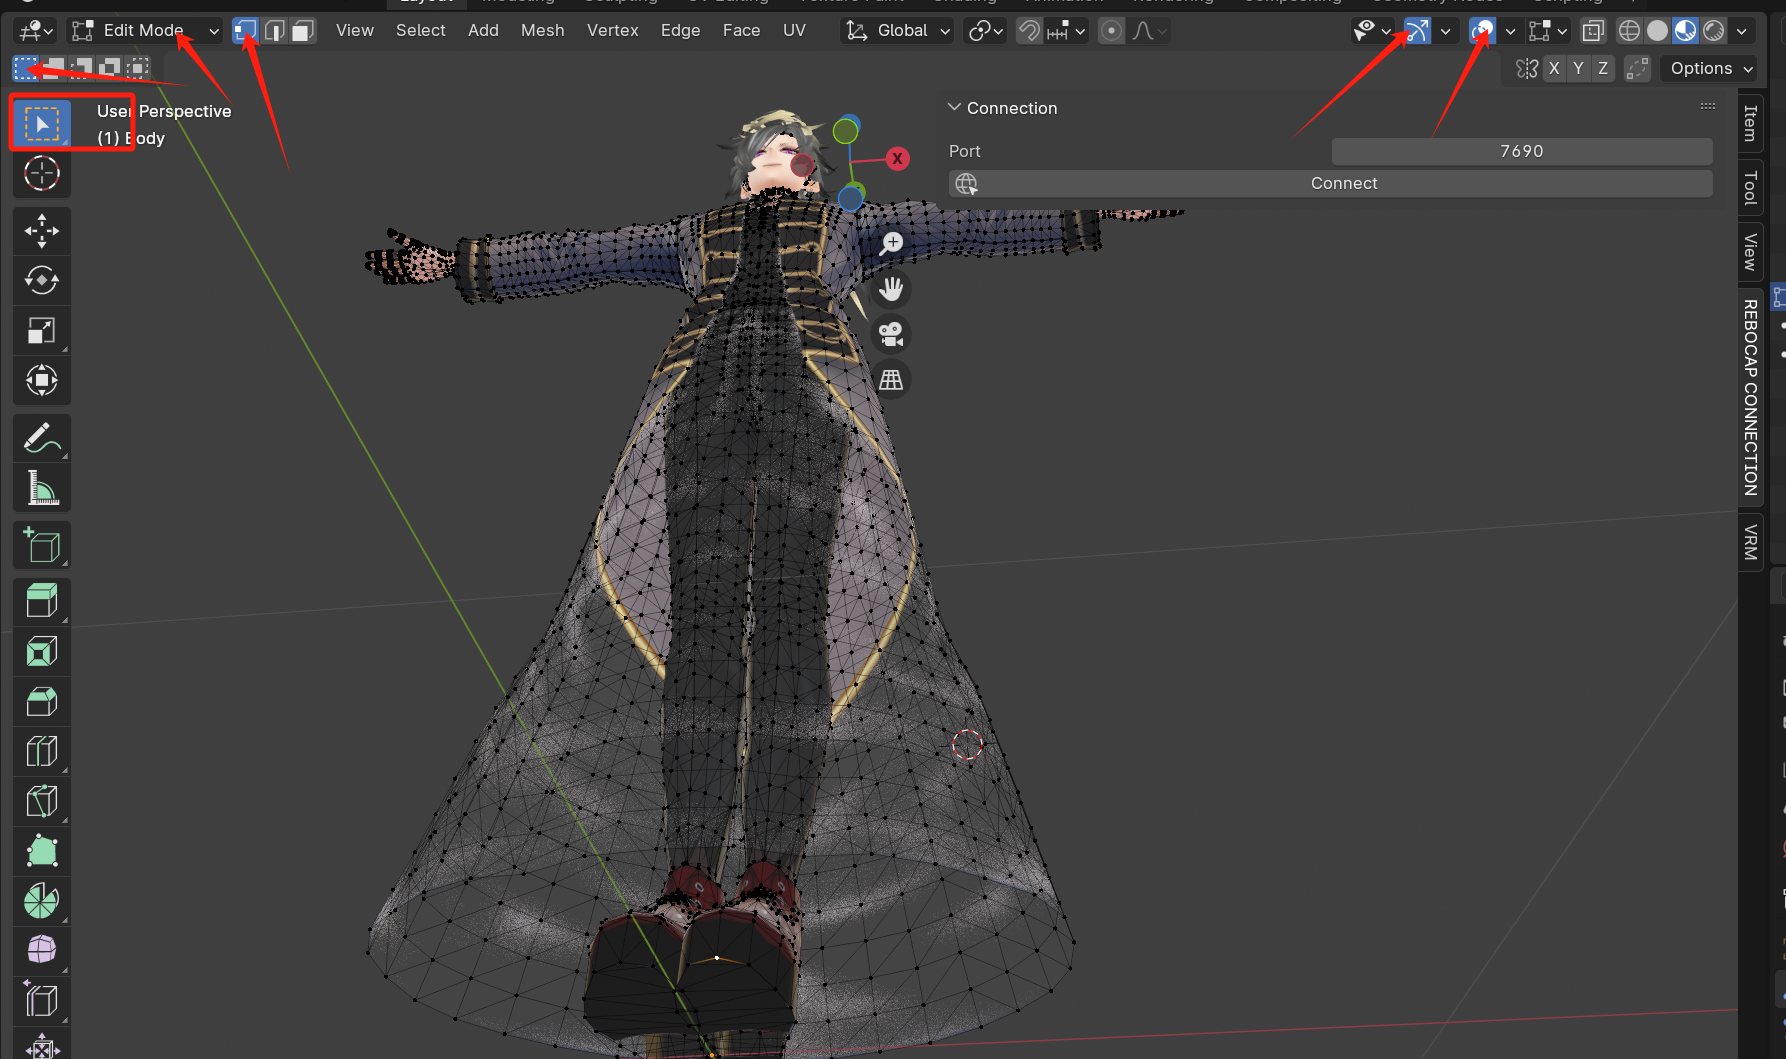
Open Edit->Preference, select Add-ons in the pop-up panel, click Install on the right, select the downloaded rebocap_blender_plugin.zip, and then click Install Add-on to install. After installation, you need to check to activate it. Enter rebocap as shown in the figure, and check the plugin to successfully install it.
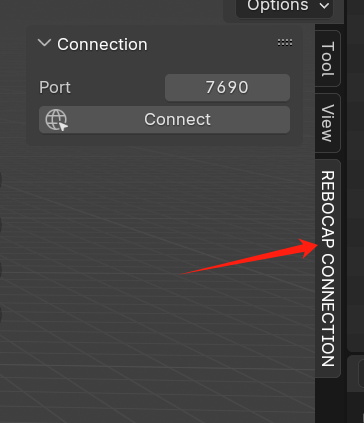
After successful installation, the corresponding plugin menu should appear on the right side, as shown in the figure.
> Note, if you don't see the menu, there is a small arrow pointing to the left that you can click to see it.
[info]What to do if installation fails
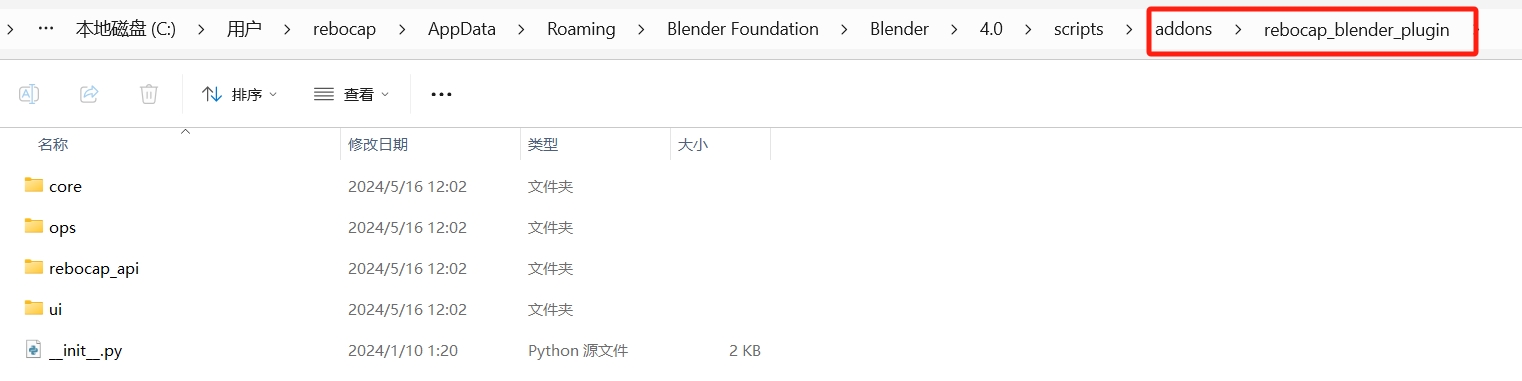
If some users fail to install, please find the original installation location of the Blender plugin and directly extract
rebocap_blender_plugin.zipto the blender installation directory. The default plugin installation location isC:\Users\<your_username>\AppData\Roaming\Blender Foundation\Blender\<version_number>\scripts\addons, whereyour_usernameis your username, andversion_numberis the version number of Blender you installed.
Skeleton Binding
- Automatic binding of VRM skeleton
- If using the Mixamo skeleton specification with FBX, automatic binding can be achieved in direct mode, meaning that in direct mode, all Mixamo avatars can be controlled.
However, the 12 fixed points on the soles of the feet need to be manually selected (this can be ignored if foot effect requirements are not high).
[danger]Reminder!!!
You must open the rebocap client and calibrate the motion before clicking
connect, otherwise you may need to restart blender to continue real-time motion capture.The bound character skeleton is driven by the hip node. If the hip node is not the root bone, or if the hip node cannot be moved (some skeletons forcibly associate the hip with the root, and the local displacement of the hip cannot be changed), then the character's buttocks may remain in place.
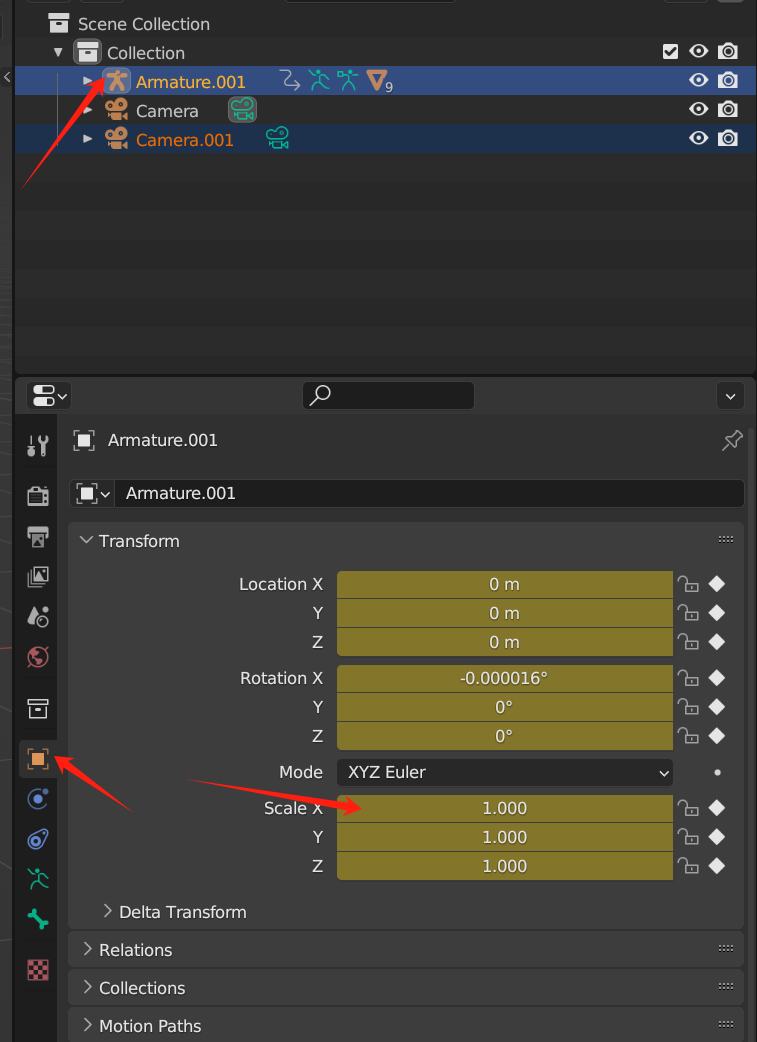
Tips: For scaling fbx to meters, please refer to the position in the figure below and change scale to 0.01
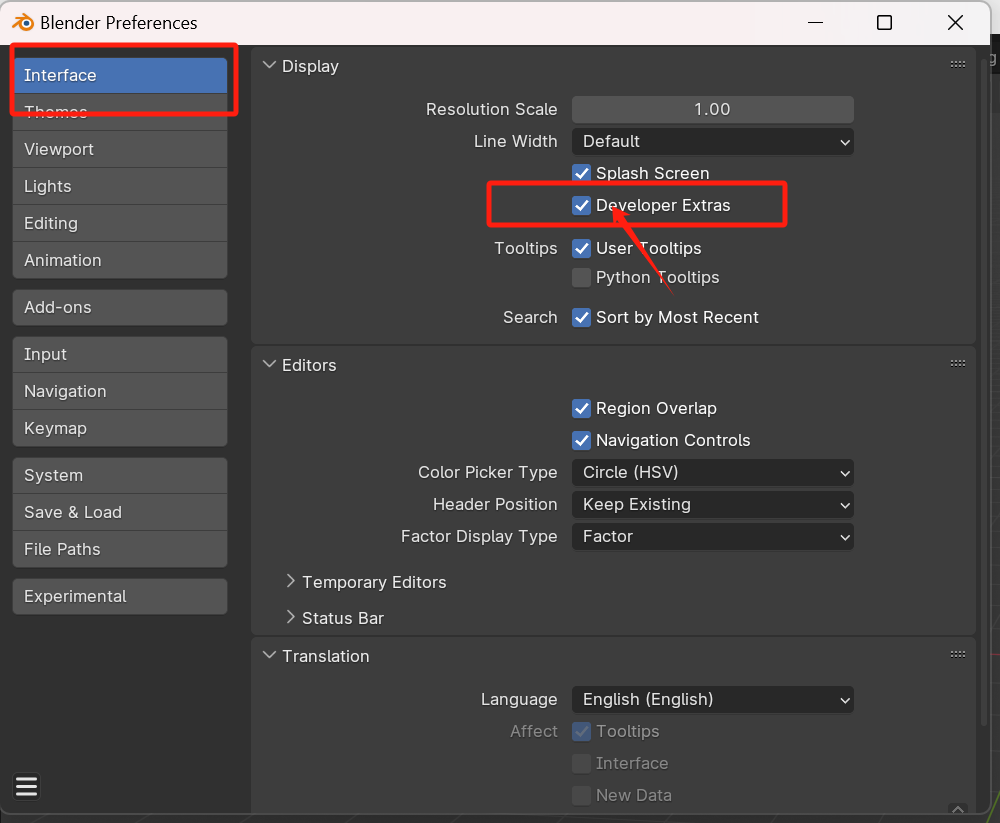
Enable Developer Mode
Open Edit->Preference, select Interface on the left, and then check Developer Extras
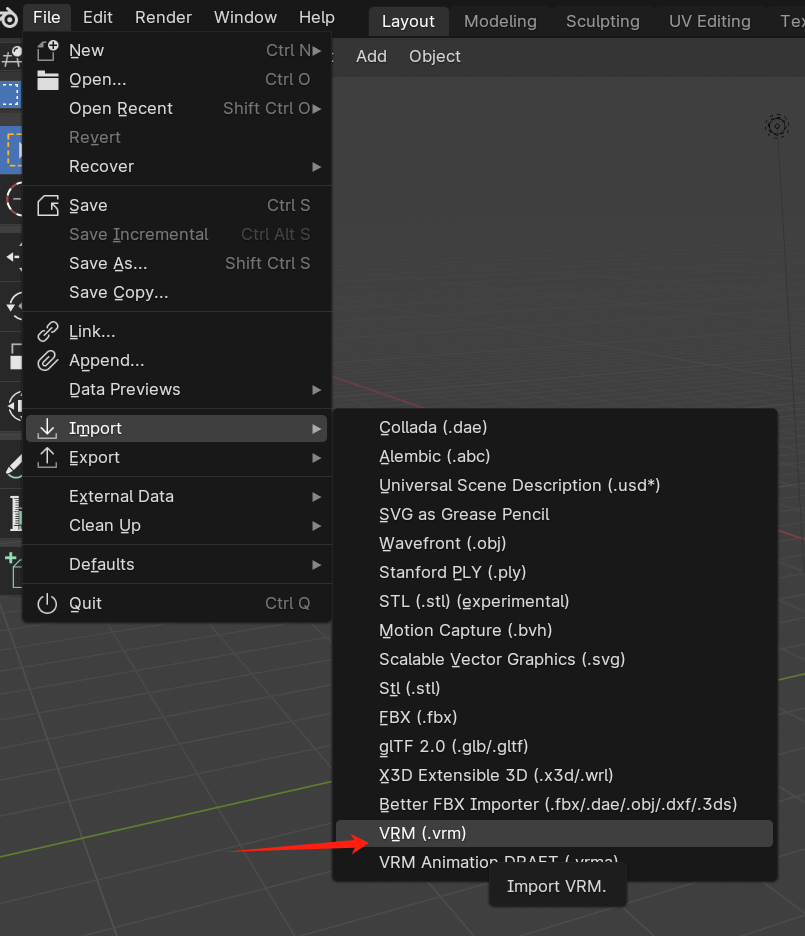
Import Character
Taking a VRM format character as an example, download the VRM plugin here.
For FBX format characters, it is recommended to use the better fbx plugin for import.
Select Target Character in Plugin
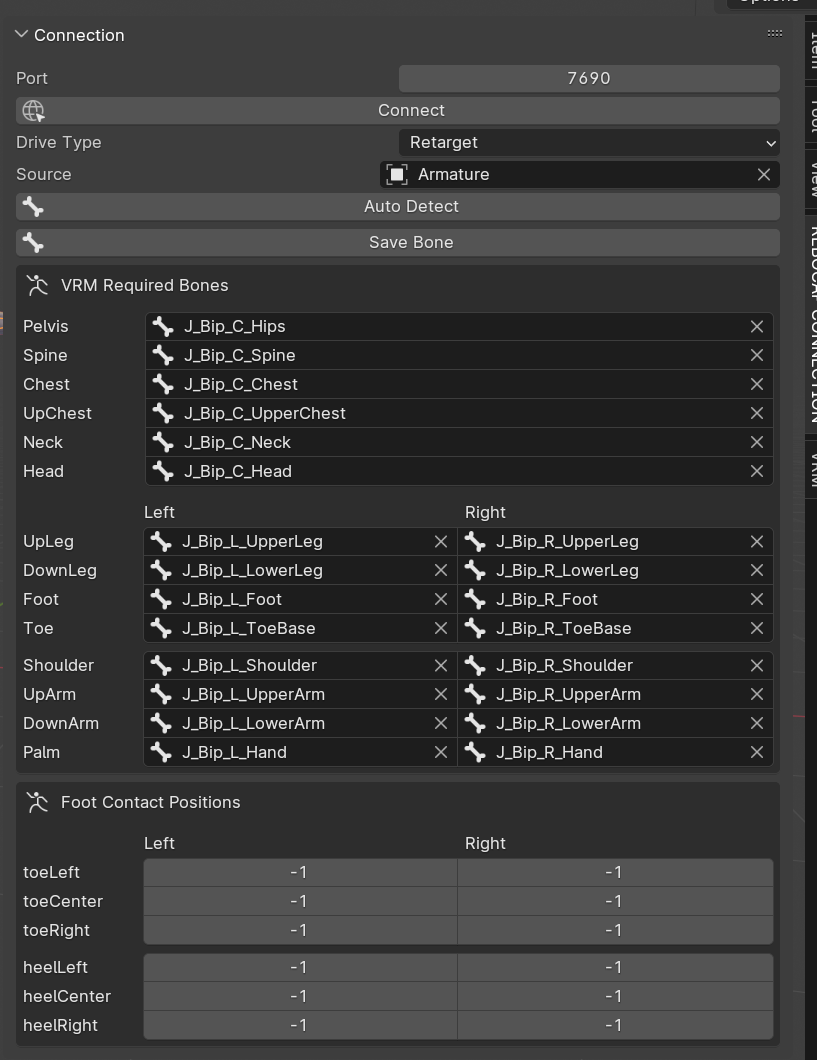
After importing, open REBOCAP_CONNECTION, select Armature on the right [the Drive Type option will not appear if not selected], then choose retarget in the REBOCAP_CONNECTION menu, and select this character as Source. You can directly drag the Armature into the Source box.
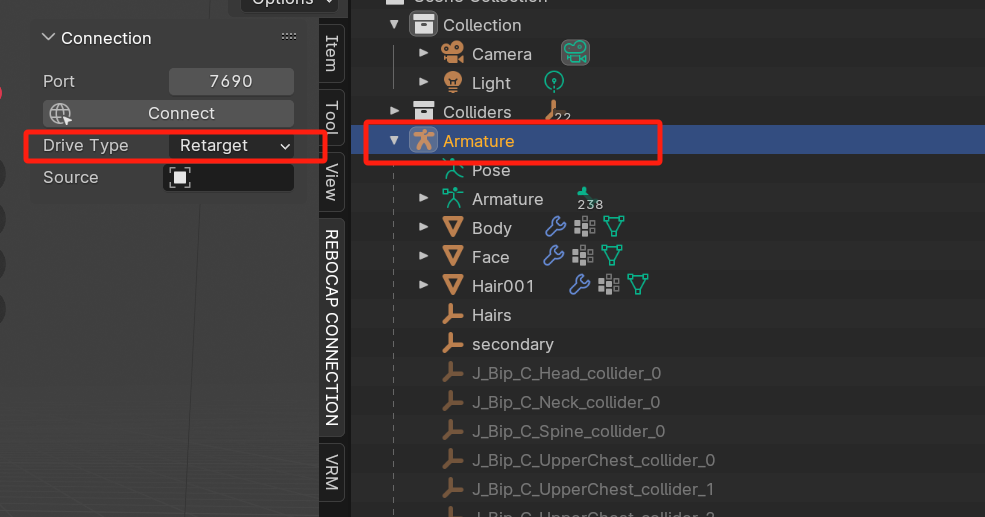

After selecting Source, the following menu will appear:
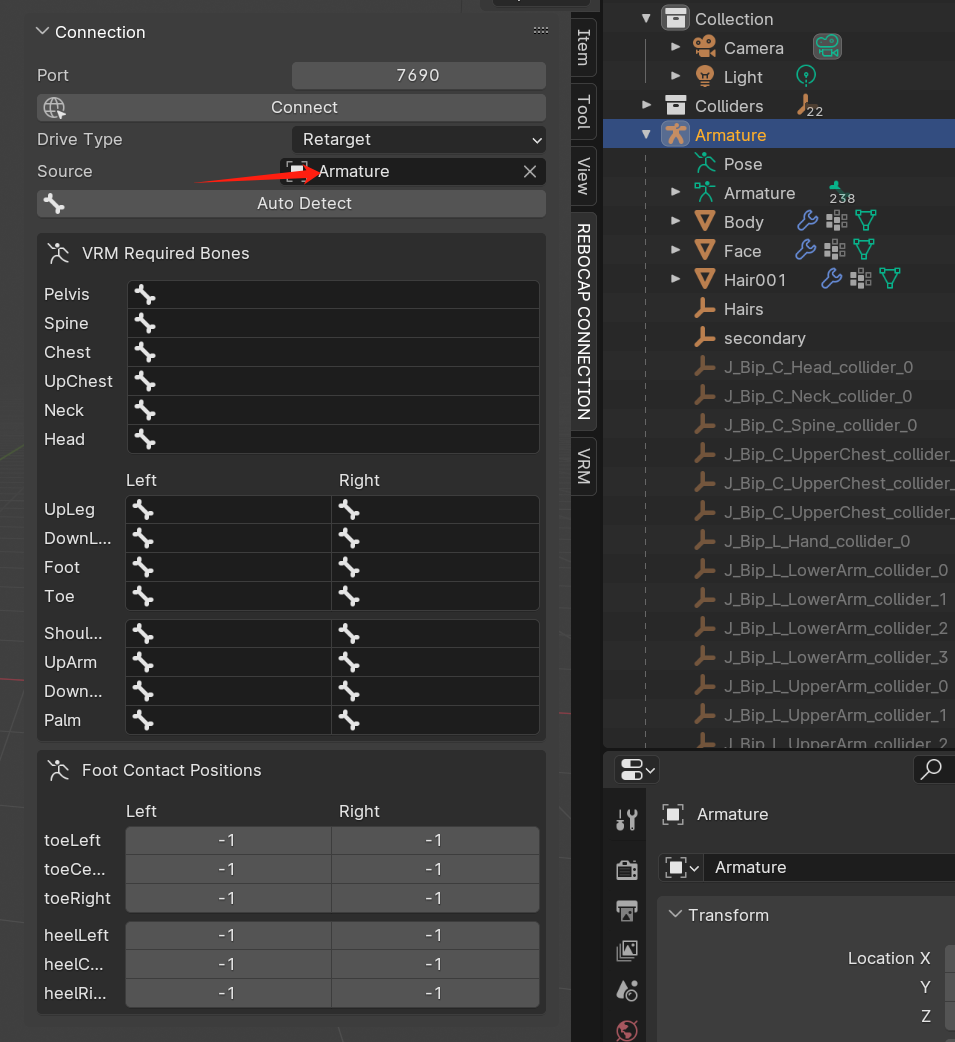
Bone Binding
Each bone needs to be matched with the corresponding bone on the target character. [Only English parts are provided here, please translate if unclear]
Pelvis is the buttocks, Spine is the bone above the buttocks, Chest has two sections, some characters have only one section of Chest, in which case you can bind to either section. If the target character has two bones, choose the one closer to the Chest. All four bones of the Leg must be bound, Toe is optional.
For VRM format characters, you can directly click Auto Detect after importing, and it will automatically fill in. Other formats require users to manually find the corresponding bone names and select them.
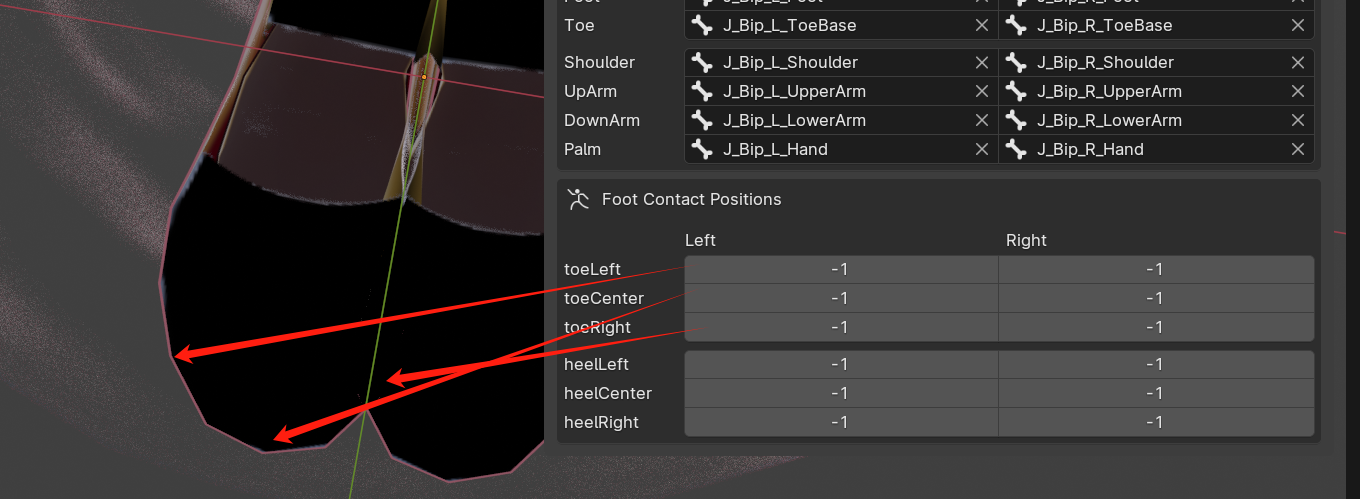
Obtain Vertex ID of Shoe Sole
This step is a bit more complicated and can be skipped if you are not overly concerned with the effect. The main purpose is to obtain the boundary of the shoe sole so that the character walks along the boundary. However, if the shoes are too large, it may cause vertical vibration when switching feet.
The first step is to enable developer mode, which was mentioned at the beginning of the document.
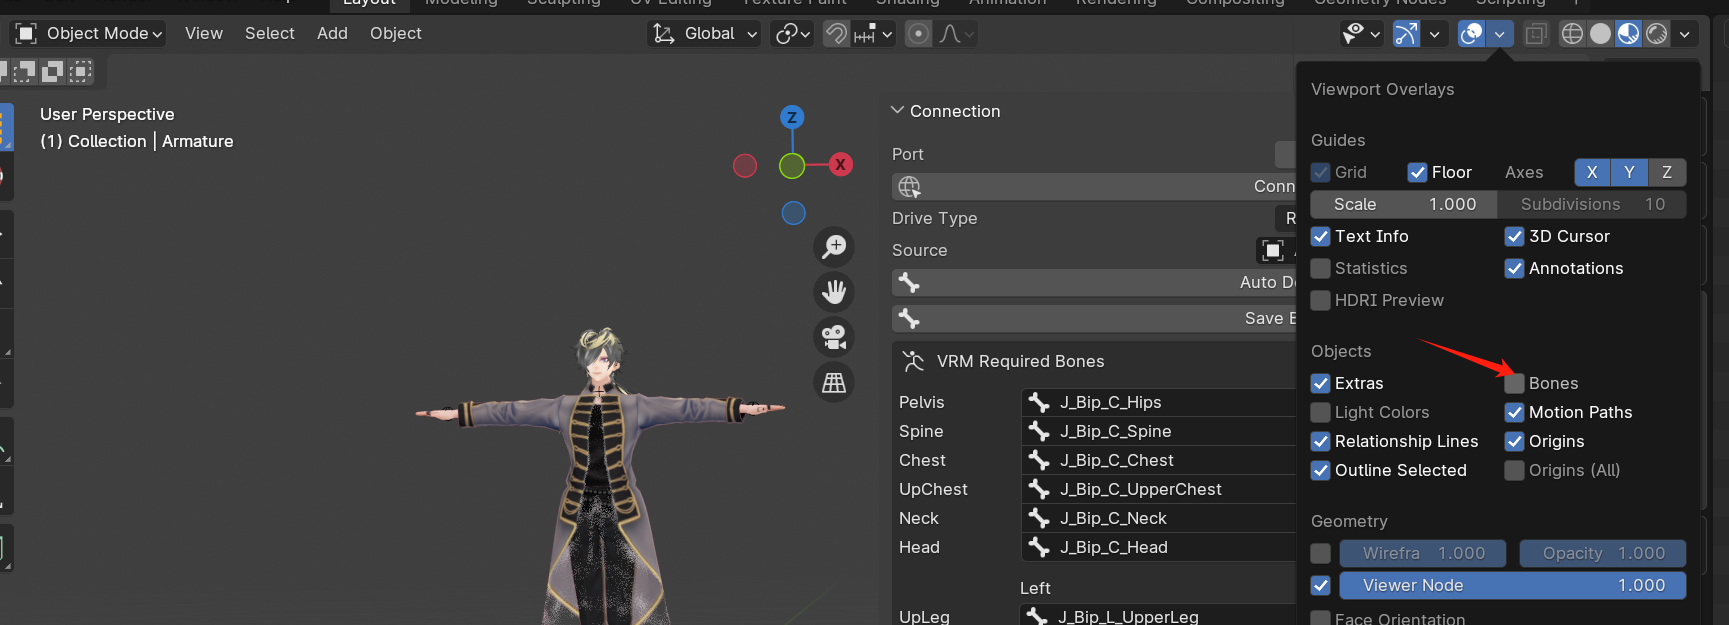
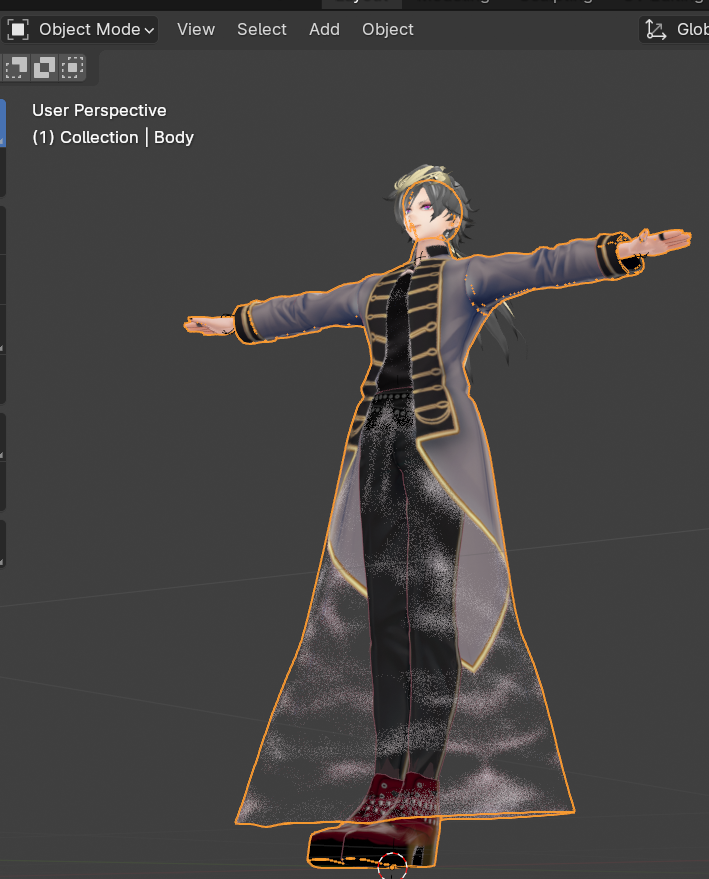
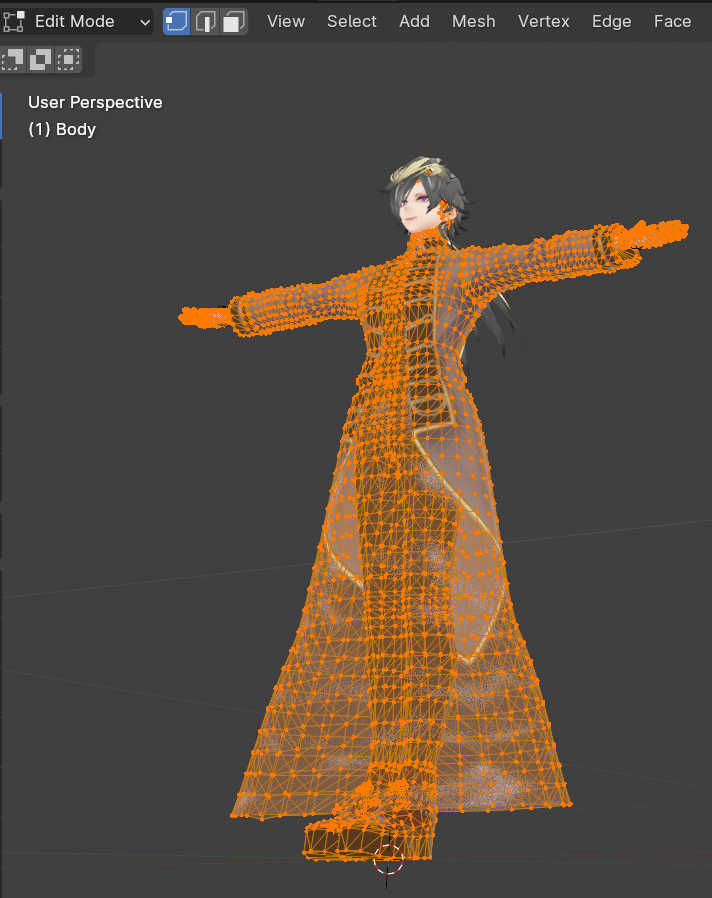
Switch to Object Mode, then deselect Bone, and click on the character's foot to select Mesh.

Click to select the character, make sure the shoe part is selected, then switch to EditMode.
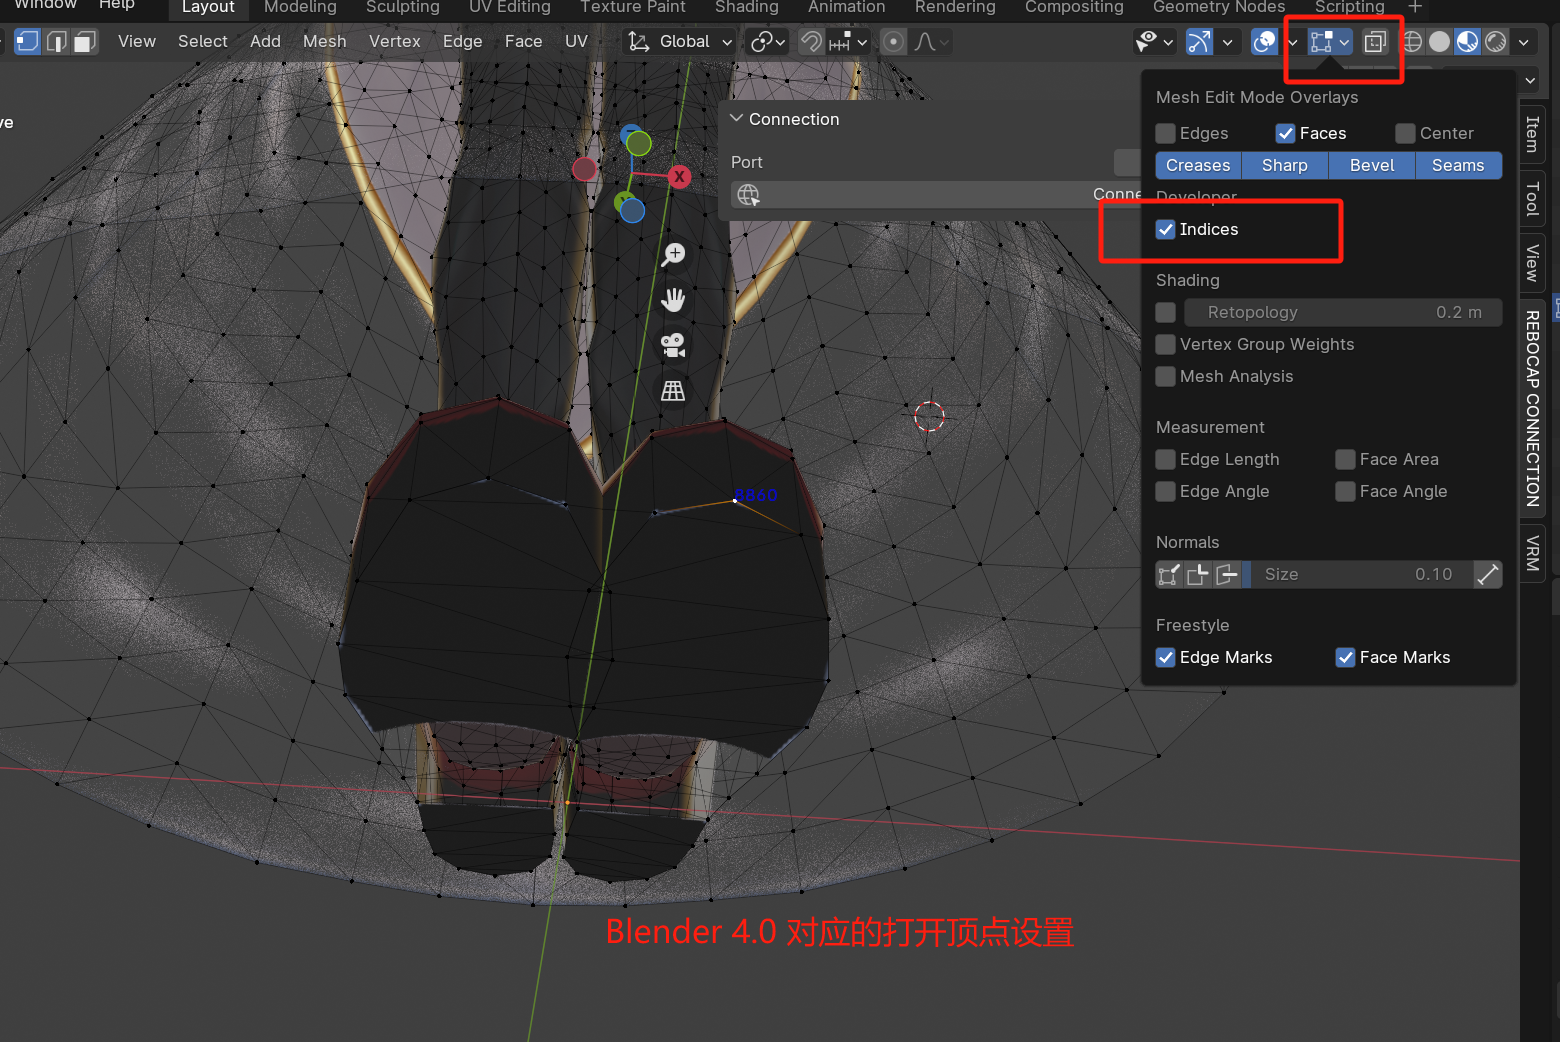
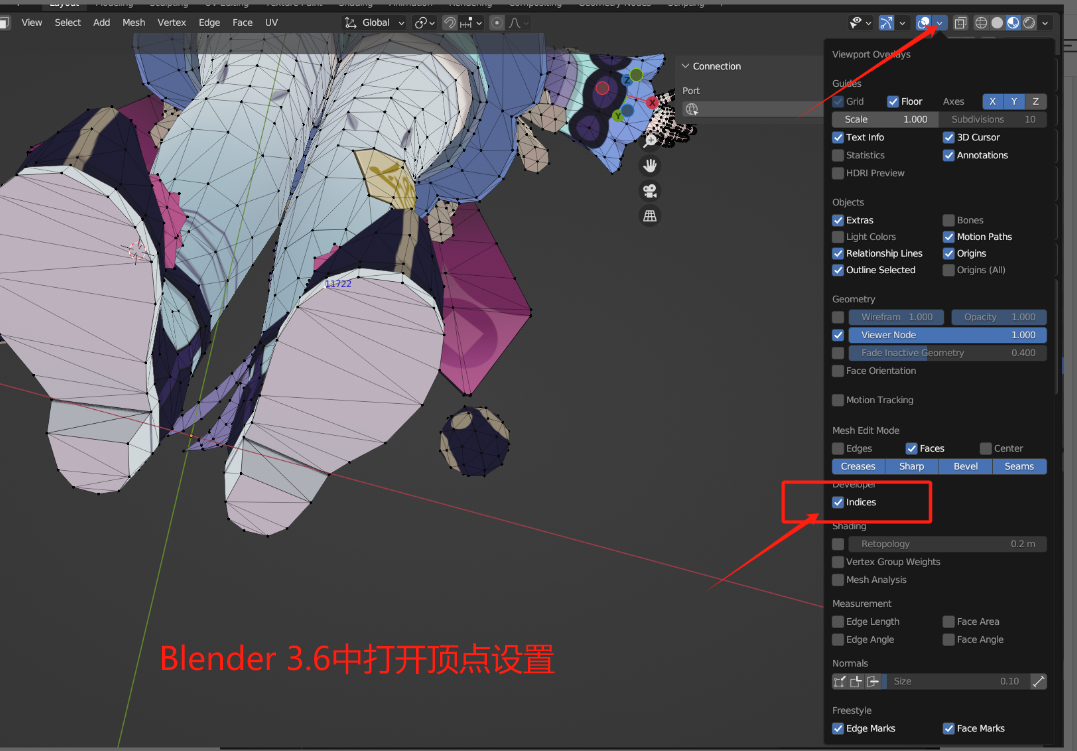
Open Indices, which differs between Blender 3.6 and Blender 4.0.
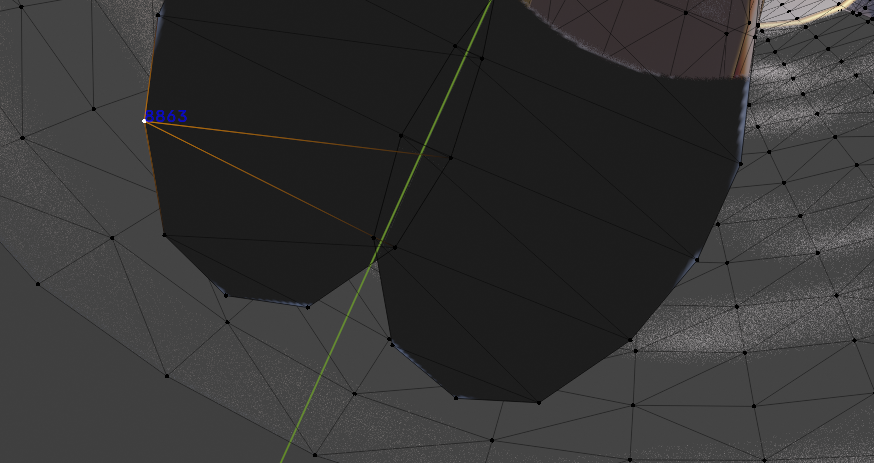
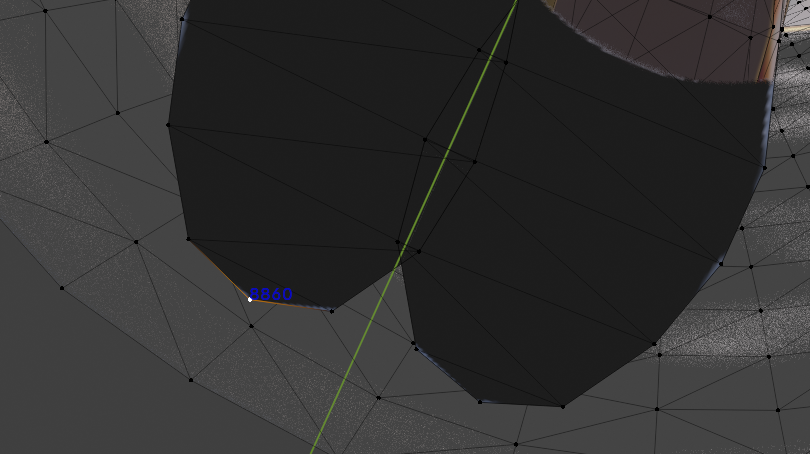
Select the vertices and record the corresponding values.
A total of 12 vertices need to be recorded: the left, center, and right of the forefoot of each foot, and the left, center, and right of the heel. Note that this is the left and right direction of the character itself. When searching, you can face the character's back towards yourself for easier identification.
During the selection of points, since you need to select the Mesh, the menu on the right will not be visible during the selection. You need to record it yourself in the order of the left, center, and right of the forefoot, and the left, center, and right of the heel.
Here are some basic operations in Blender:
shift + mouse wheel click is for dragging
ctrl + mouse wheel click is for zooming
mouse wheel click is for changing the view
After recording, switch from
Editmode back toObjectmode, selectArmature, and then fill in the foot IDs.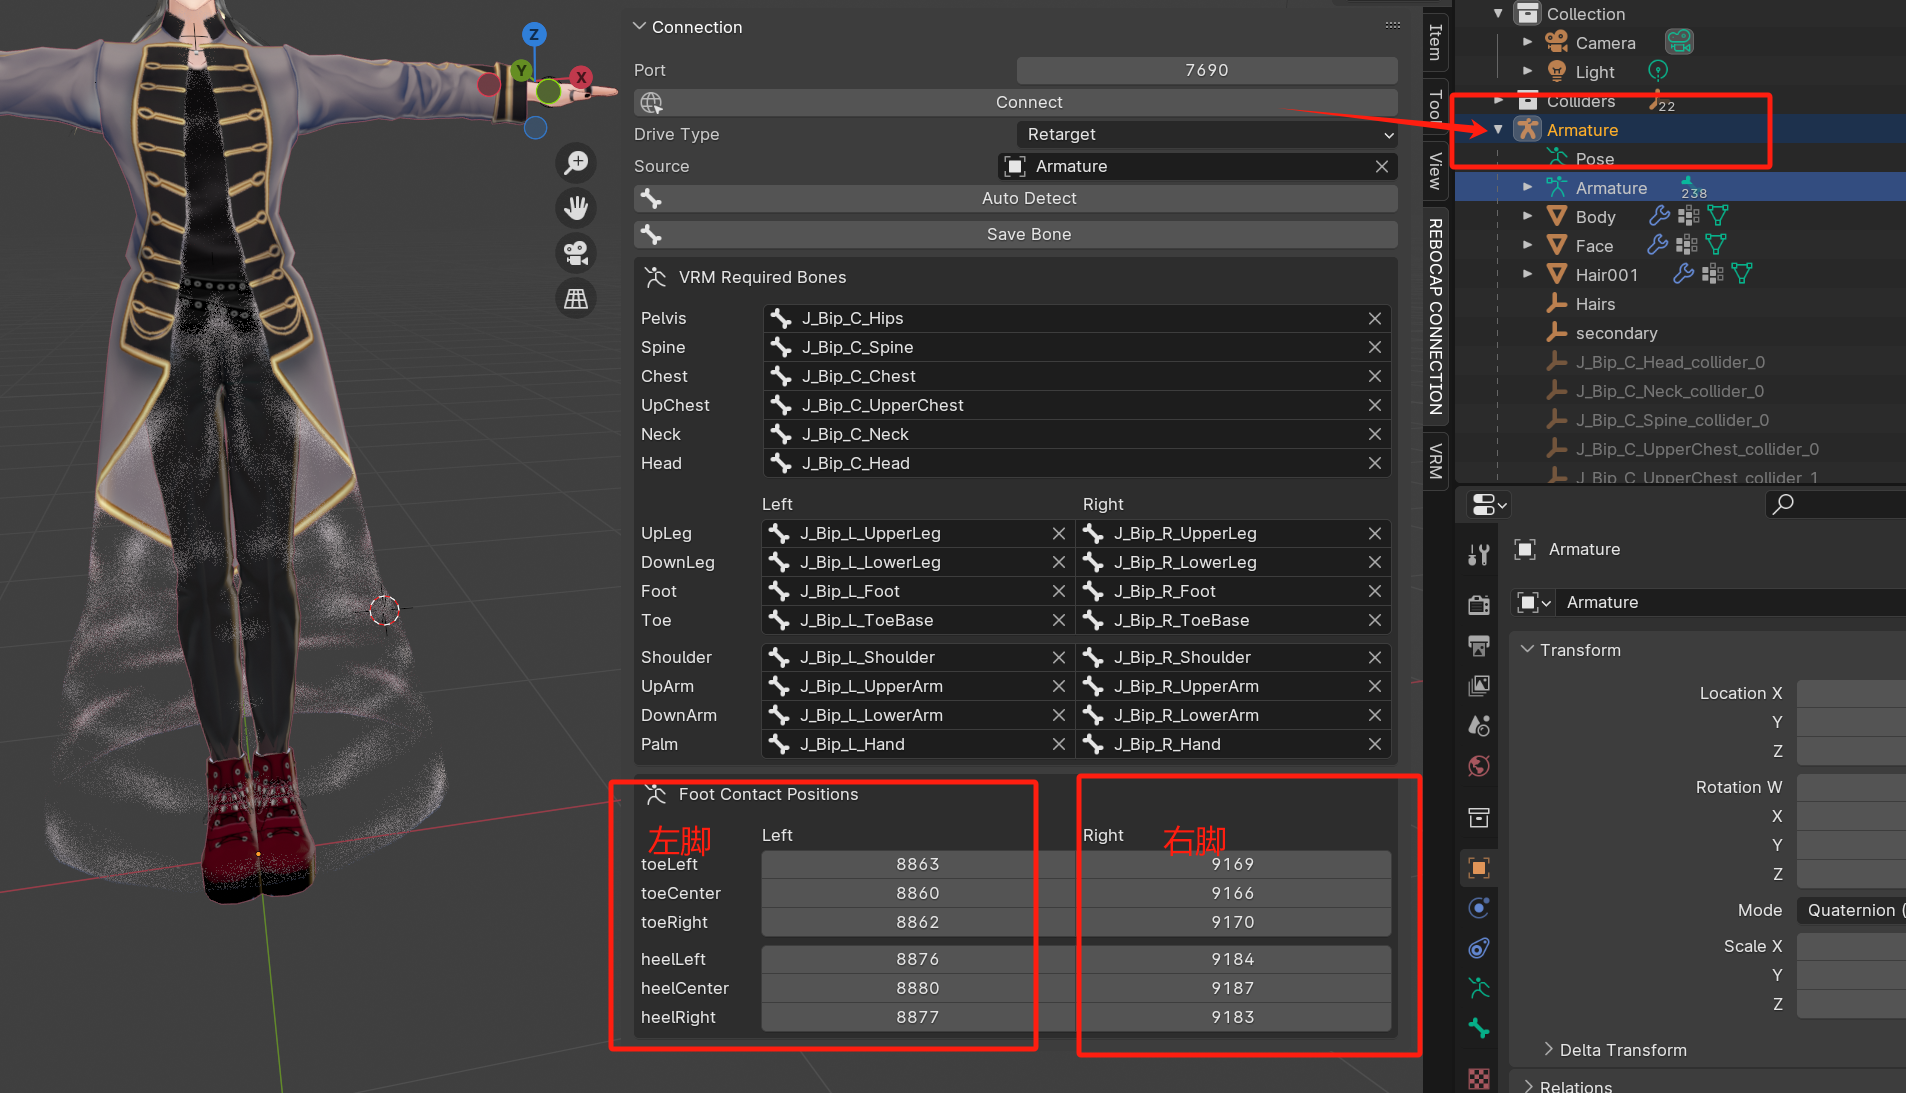
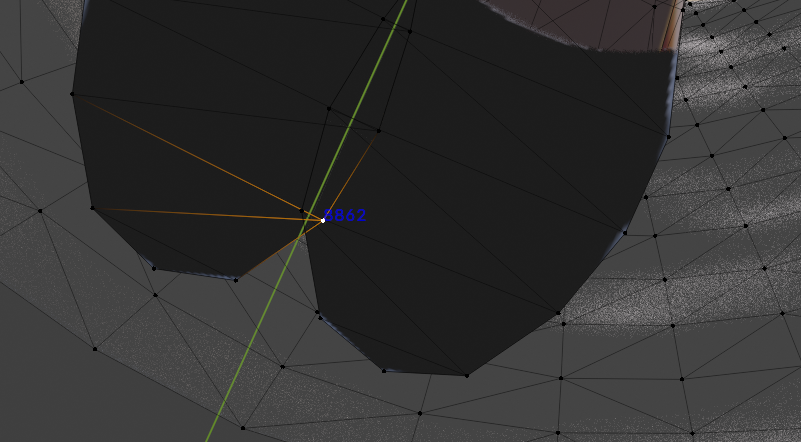
Example Explanation for Binding Sole Vertex IDs
For example, the three vertices of the left forefoot of the character below are: 8863 8860 8862
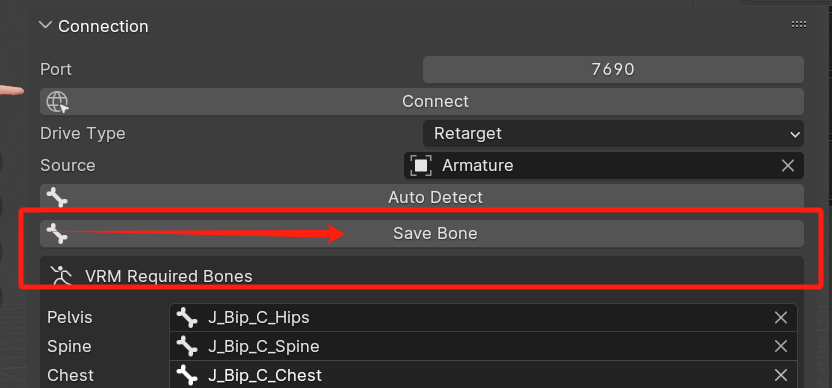
Skeleton Export
After all the key bones are bound, a save bone button will appear. Click export and choose a location to save.
Then import it into Rebocap, refer here