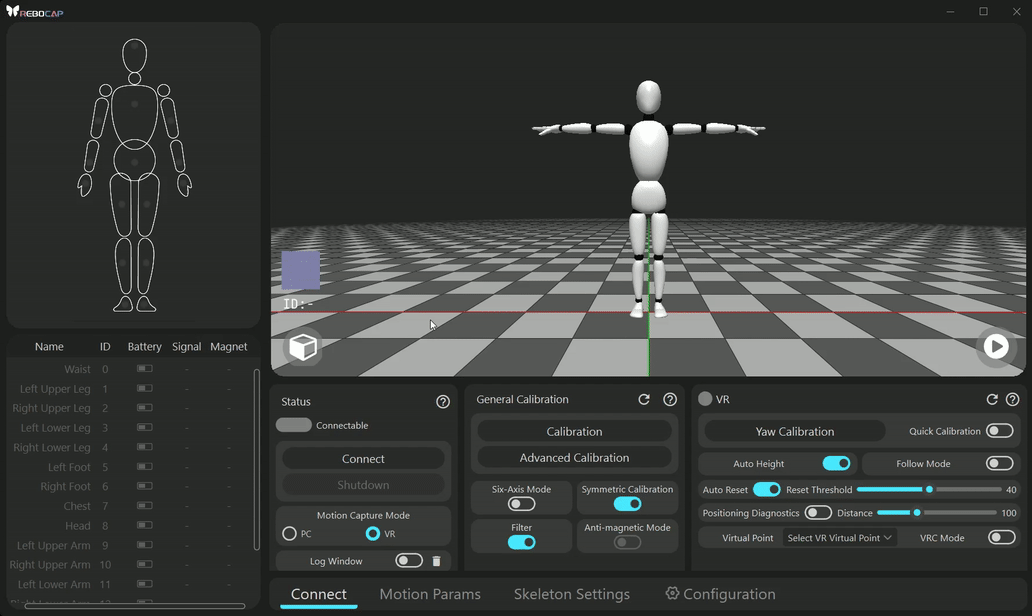
Connection
- Power on the tracker you want to connect
Supported tracker combination modes can be found in the previous chapter
- Insert the receiver into the computer's USB port
- Open the Rebocap software and click connect
Reasons for Connection Failure and Solutions
- There may be an issue with the USB port, for example, some users' computer USB ports accumulate dust, which can lead to unstable connections.
Try changing the USB port or unplugging and replugging it
- A
Rebocapclient may already be running, causing the port to be occupied, or another program may be using the portThe symptom is that the
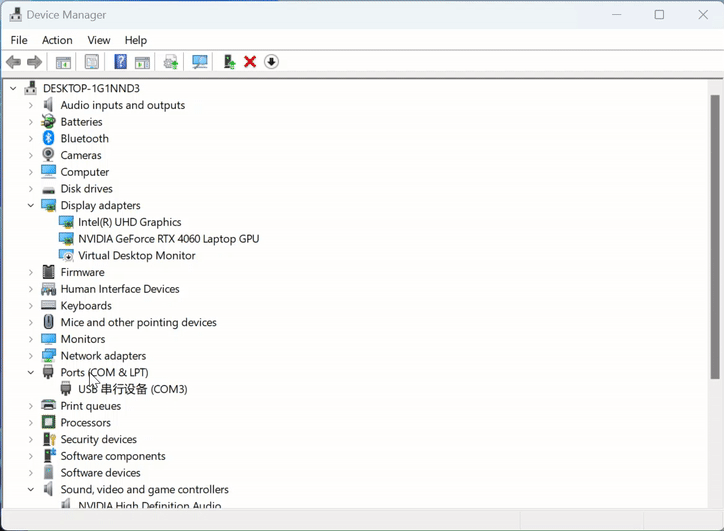
Connectbutton is clickable, but the connection fails. At this point, ensure that otherRebocapclients are completely closed, and it is recommended to unplug and replug the receiver. Also, check the task manager for otherRebocapprocesses and forcefully end them if found. - Ensure the serial port is functioning properly and that no other virtual serial port software is installed. Some users may experience driver failure after installing virtual serial port devices.
For example, if the
com0comdriver is installed, it needs to be uninstalled, and then the receiver should be unplugged and replugged. Ensure that the driver has not been replaced. You can follow the steps shown in the image below to roll back the receiver's serial port driver. If it still cannot connect, unplug the receiver and reinsert it.
If calibration cannot be performed after connecting, and the RGB light color cannot be changed, you can also try rolling back the driver.
Weak or Unstable Signal After Connection
- If using a desktop computer, do not place the receiver behind the chassis.
- Try to maintain an open area of more than 5cm next to the receiver, for example, do not insert a USB drive next to the receiver. If possible, using an extension cable may help improve the signal.
Calibration
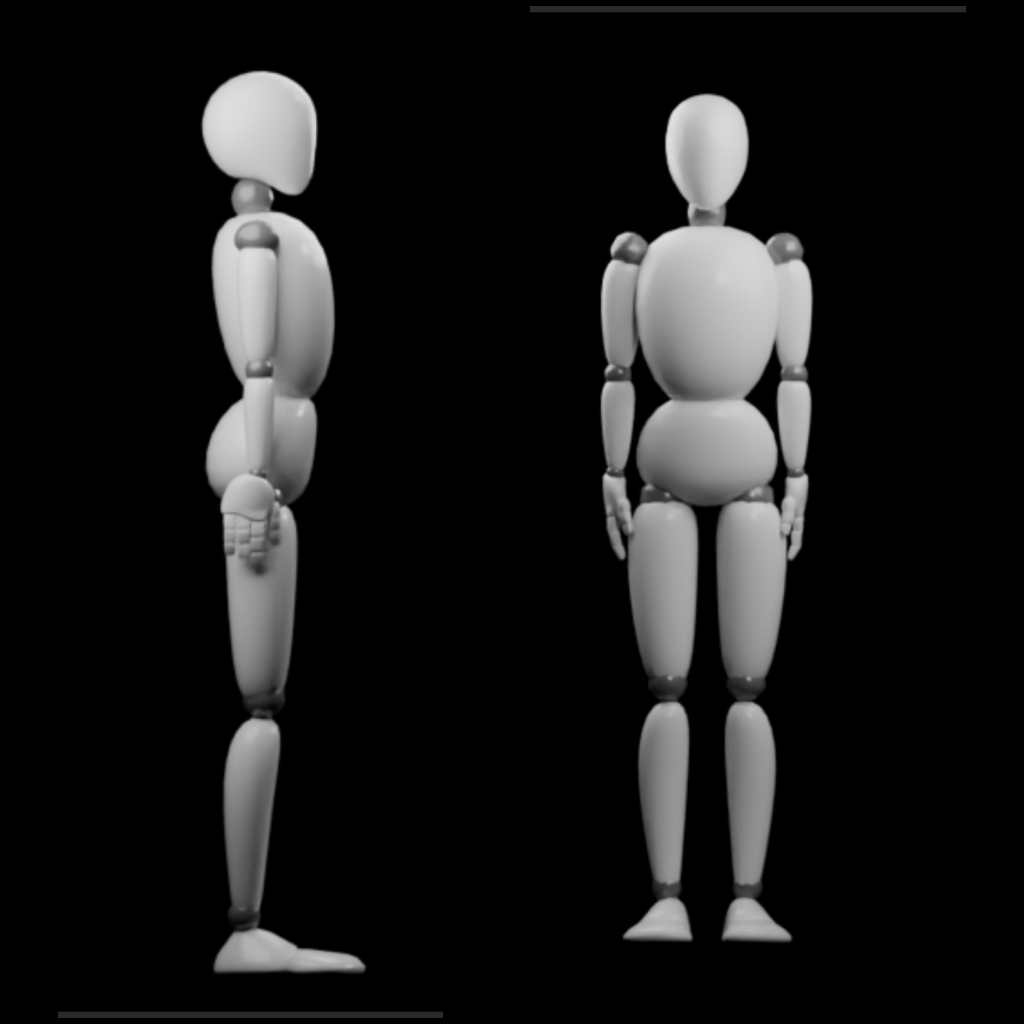
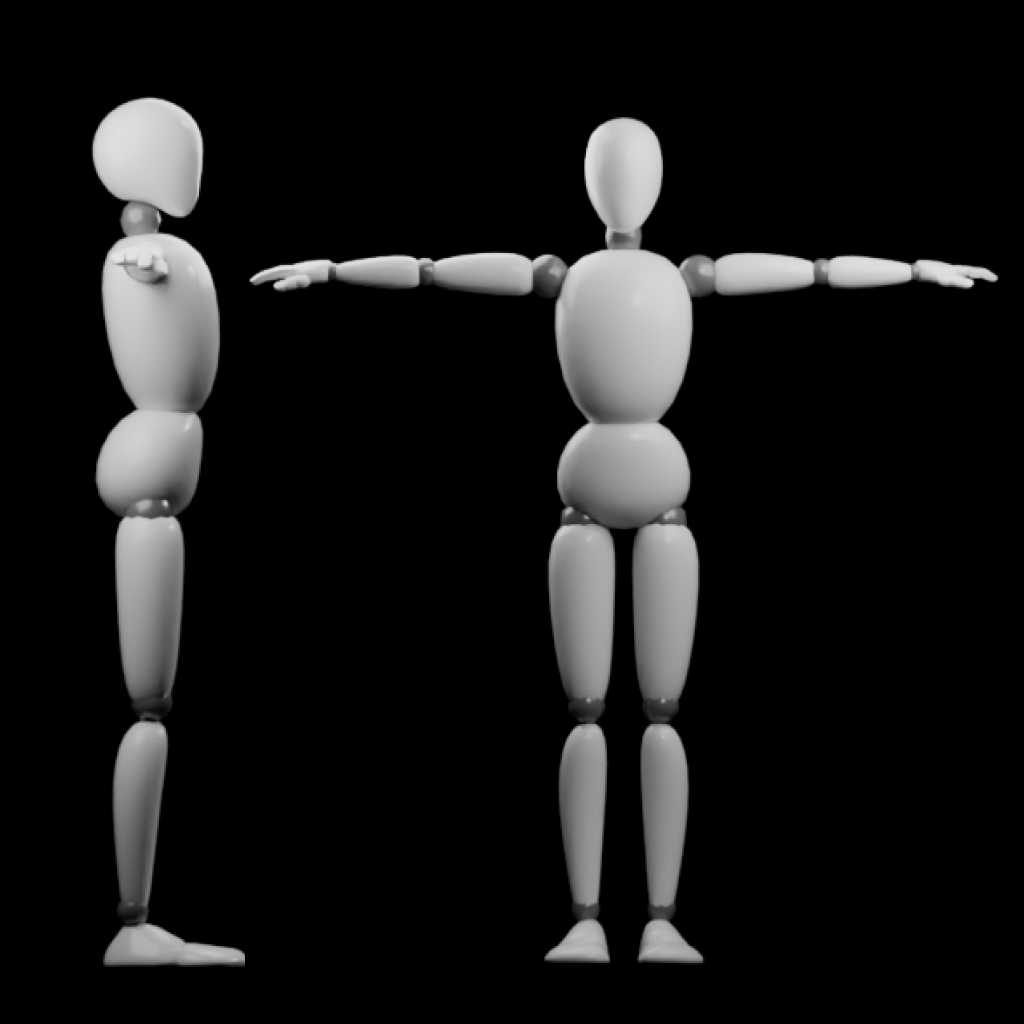
Please refer to the image below for wearing instructions. The specific wearing position varies from person to person. For principles and details, please refer to the previous chapter.
[info] Be sure to test 15 points for first-time use
If the test results are poor, there may be the following reasons:
- Magnetic field issues; please refer here for specific solutions.
- The gyroscope may need calibration; please refer here.
- Issues with wearing and pulling; please read carefully and refer here.
Pose Calibration
Click the Pose Calibration button in the software interface. The pose calibration reference is shown in the image below, and there are corresponding image prompts in the software. Be sure to read all key points and action specifications.
Calibration Key Points
- After clicking Pose Calibration, immediately enter the A-Pose and remain still.
The system will start detecting whether the person is stationary 2 seconds after clicking. Be careful to control the front and back swaying amplitude, minimizing movement as much as possible to complete the initialization of each sensor. The detection duration is 10 seconds; as long as it detects that you have been stationary for the last 2 seconds, it will immediately enter the calibration program.
- During the rapid beeping period for each action, the system will record the corresponding pose data.
Be sure to remain still during the rapid beeping period. It is recommended to switch actions 1 second after the rapid beeping ends.
- After switching actions, please remain still and wait for the rapid beeping to sound. It is recommended to complete the switching process within 2 seconds.
- During the action switching process, do not move your feet.
Both feet must remain strictly still during calibration, with no movement whatsoever.
- After clicking Pose Calibration, immediately enter the A-Pose and remain still.
Action Specifications
A-Pose
Both legs should be vertical and as parallel as possible, with about a fist's distance between the feet. Both arms should be straight down, not bent, with palms facing towards oneself, back straight, and looking straight ahead.
If you feel that the feet are closed after calibration and the virtual character's feet are crossed, then reduce the distance between the feet during calibration.
If you feel that the feet are closed after calibration and the virtual character's feet distance is too large, then increase the distance between the feet during calibration.
T-Pose
Both legs should remain consistent with the A-Pose, and both arms should be extended outward, aligned with the shoulders, and both hands should be in a straight line, palms facing down.
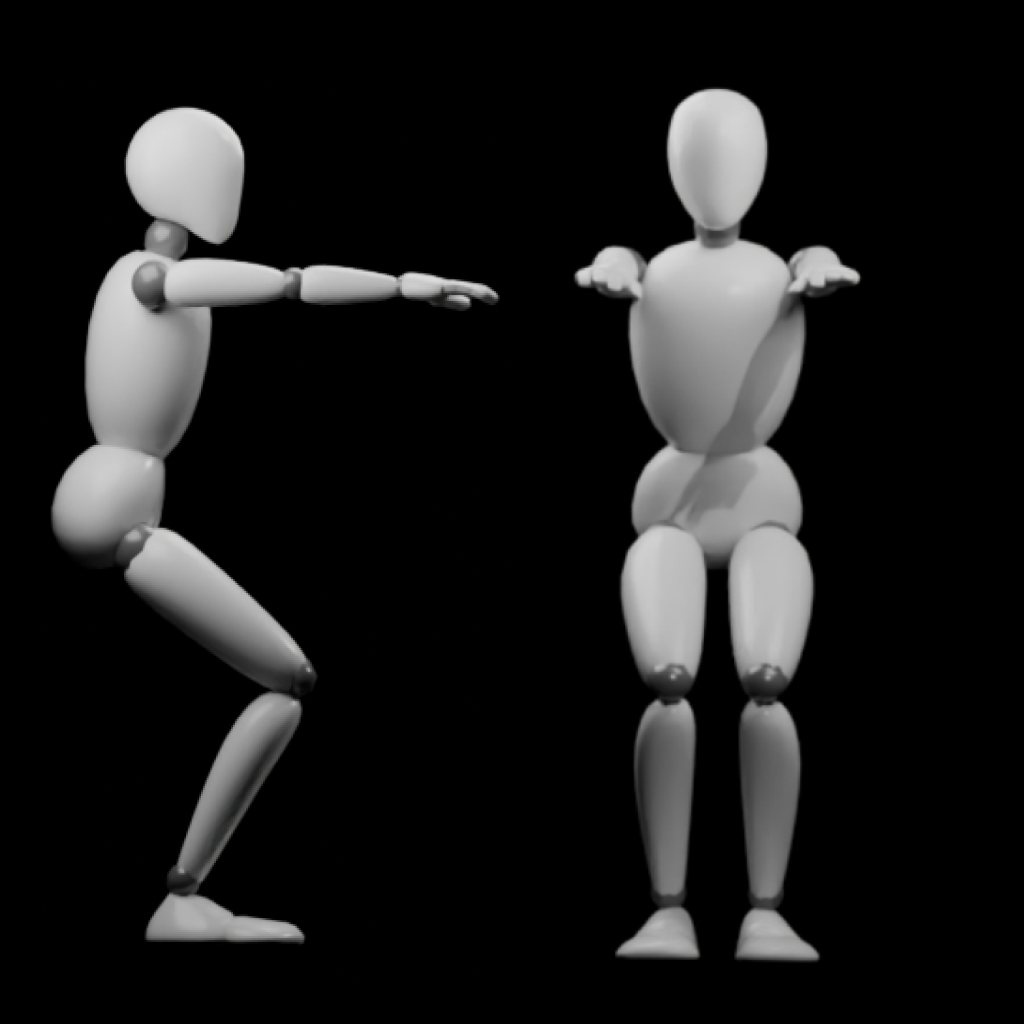
S-Pose
Both legs should be slightly bent forward at about 30 degrees, without excessive bending. Both arms should be extended forward, perpendicular to the upper body, parallel to the shoulders, and both arms should be parallel.
If the arms are not wearing trackers, the arm movements can be ignored.
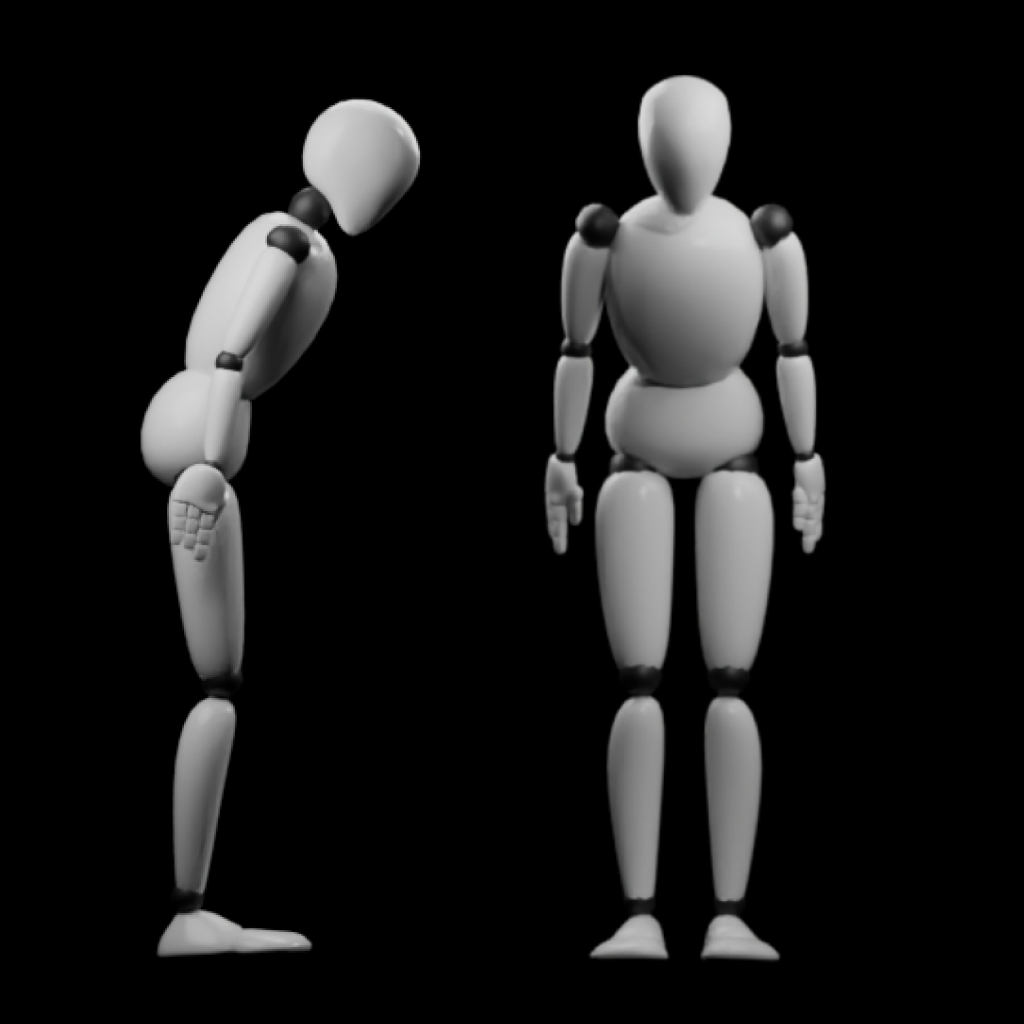
B-Pose
The upper body should bend forward at 30 degrees, and hand movements do not need to be considered.
B-Pose stands for Blend-Pose, mainly used to calibrate the heading angles of the waist, chest, and head trackers.
The images from left to right are: APose TPose SPose BPose
Software Integration
SteamVr Integration refer here
- VRChat Integration refer here
- Community integration tutorial https://kdocs.cn/l/cbZLGg2QeEHk,if the link is inaccessible please download the PDF file to view (offline file may not be updated promptly)
VMC Protocol User Integration refer here
- warudo Integration refer here
Must-Know Items
To avoid various issues during use (such as trackers inexplicably tilting) and to ensure a better motion capture experience, please make sure to read the following instructions.
Hardware Calibration
How to Set Motion Capture Configuration in Software
- For magnetic field configuration, please read Magnetic Field Related Instructions
- For other configurations, you can click the question mark icon at the top right corner of each configuration panel
Best Way to Bind Straps
If you skipped the previous section, please read it during your free time, or make sure to read it thoroughly if you encounter any issues.
[info] Important Points Re-emphasized
It is emphasized again here that the binding method of the tracker on the sole is crucial. Try not to use straps to prevent the tracker from being affected by friction between the strap and the ground, which could impact the overall motion capture effect. Please refer to the previous section for details.